Thursday, February 26, 2015

Maracon Meltdown

I tried making macarons for the first time to try something new instead of the regular cupcakes I bake and decorate.  I used this recipe for the macarons: http://www.sweetandsavorybyshinee.com/lemon-french-macarons/.

Unfortunately, the macarons I made looked nothing like the ones in the recipe did, instead coming out cracked, broken, and slightly sticky although they were turning brown whilst they were in the oven (which is why I took the macarons out when I did). I began thinking about what I did differently that could've caused the disaster, and here's what I came up with: 1) I used a hand mixer instead of a standing mixer, 2) I overbeat the egg whites/egg white mixture, 3) I used a different sized tip when piping out the batter onto the sheets, making different-sized macarons, and 4) I didn't use yellow gel food coloring (I mistakenly used yellow decorating gel).  Are there any tips on how to make macarons?

I wanted to decorate the macarons for Chinese New Year, choosing yellow and red for good luck. Since I used yellow decorating gel instead of yellow gel food coloring, the macarons didn't come out yellow.  In order to make the macarons yellow, I used this:

Afterwords, I tried writing "Happy Chinese New Year" (pronouced sun nein fai lock) in red on top of some of the macarons as well as the chinese character for ram for the Year of the Ram, using this:
However, after I followed the instructions to make the icing (microwave the bottle for 5-10 seconds and then knead the bottle until the icing hardens), the icing never hardened, so I ended up using a toothpick to write the characters on the macarons.

I want to try making macarons again, possibly with a new recipe, while also fixing my mistakes (such as using gel food coloring and not decorating gel).

Total Estimated Time: 4.5 hours.
Total Time Logged: 20.5 hours.

Here's what I salvaged and Happy Chinese New Year! (the word ram is written on the uppermost macaron):


Friday, January 30, 2015

Ballerina Cupcake

Last night, I baked lemon cupcakes with lemon frosting and buttercream toppers.  The recipe I used for the lemon cupcakes and lemon frosting was: http://www.crazyforcrust.com/2014/03/perfect-triple-lemon-cupcakes/ but I didn't want to use the lemon curd, so the cupcakes were "double lemon" instead of "triple lemon cupcakes."  I used the star tip when piping the frosting and a smaller size star tip to make the tutu look as if it was made of tulle.  I used this recipe for the buttercream toppers: http://www.craftymorning.com/easy-snowflake-cupcakes-diy-toppers/ and this template in order to make the toppers look like ballerina tutus: https://s-media-cache-ak0.pinimg.com/236x/ae/8e/b9/ae8eb9df463fde74707d4b7e7192a680.jpg.  I simply used a little bit of red food coloring to make the buttercream toppers pink. I then piped the buttercream frosting on to a piece of wax paper on a tray with templates of the tutu that I printed and placed under the wax paper.  Unlike the SF Giants cake, I didn't have to make sure that the template was backwards before piping the design since the tutu is pretty symmetrical.  I used a star tip when the frosting on top of the cake once again because I feel that the star tip is best at adding ridges to the frosting.  I also used a star tip when piping the tutu, but this star tip was much smaller so that I could be more exact.  One of the major problems I had when piping the tutu was that buttercream melts extremely quickly, so the first few tutus came out extremely well, with the ridges appearing, but after a while, the buttercream started melting in the bag because of the warmness of my hand and the ridges no longer appeared.  As a result, I had to continually refill the bag while dumping out any excess buttercream that became overheated.  In addition, I discovered that I had to transfer the tutus onto the cupcakes quite quickly so that the heat from my hand wouldn't melt the tutu before I was able to place it onto the cupcake.

My next goal is to try to make something other than cupcakes to see if I can decorate those too and to expand my pastry making knowledge and skills.

Total Estimated Time: 2 hours
Total Time Logged: 16.5 hours


Thursday, January 29, 2015

My Neighbor Totoro

Yesterday, on January 28th, I baked buttermilk chocolate cupcakes with vanilla buttercream frosting.  I used this recipe for the buttermilk chocolate cupcakes: http://www.tasteofhome.com/recipes/buttermilk-chocolate-cupcakes and this recipe for the vanilla buttercream frosting:  http://www.foodnetwork.com/recipes/quick-vanilla-buttercream-frosting-recipe.html.  However, I reduced the sugar for the chocolate cupcakes from 1-1/2 cups to about 1-1/4 cups and I reduced the sugar for the vanilla buttercream frosting by one cup (from 3 cups to 2 cups of confectioner's sugar).
The inspiration behind the cupcakes is the character Totoro, from the Miyazaki film My Neighbor Totoro.  (For a picture of Totoro: http://www.imgbase.info/images/safe-wallpapers/anime/my_neighbor_totoro/35735_my_neighbor_totoro.jpg).  Totoro is a lovable, fluffy character who lives in a tree, so I chose to bake chocolate cupcakes to make the trunk of the tree and dyed the buttercream frosting green to represent some bundles of leaves of the tree.  The bundles of leaves are surrounding Totoro on the final cupcakes and Totoro is sitting on top of the "tree," just as he would be when sleeping in the tree in the film.  The Totoros on my cupcakes were made out of marzipan using this recipe:  http://candy.about.com/od/marzipancandyrecipes/r/Marzipan.htm.  I simply dyed some of the marzipan gray, shaped the marzipan into Totoros, and placed some marzipan that had no food coloring for Totoro's stomach.  I used a toothpick and some black food coloring and drew on Totoro's eyes and "mustaches" on his stomach.

The next task will be for me to once again try to bake another type of cake that's not chocolate (red velvet is essentially chocolate cake).

Total Estimated Time: 4.5 hours
Total Time Logged: 14.5 hours

Here are a few pictures of each of the sides of a single Totoro made of marzipan:


Here are some pictures of 3 of the cupcakes (I tried to take pictures of the cupcakes from all angles):


Monday, January 26, 2015

Snowman

I decided to decorate a cake as a snowman.  I used the same red velvet and cream cheese frosting recipes as before (there seems to be a recurring theme with red velvet cake, but I assure you that there will be different types of cakes soon).  I used a snowman head silicone mold that I stumbled upon after Christmas, and I used the basic, 10-inch diameter pan for the body of the snowman.  The cake ended up being a single-layer cake.  I simply dyed the cream cheese frosting orange for the carrot nose and black for the eyes, buttons, and hat.  I placed a small gummy butterfly on the snowman's hat to add a little bit of playful character to the snowman.  To add texture to the snowman and to make the snowman seem as if he were made of actual snowflakes instead of a smooth, unrealistic texture, I placed coconut flakes on top of the cream cheese frosting.  I found that doing so was somewhat difficult, as alot of the coconut flakes wouldn't stick on to the frosting.  In addition, trying to separate the different colors of frosting was very tedious.  Furthermore, when I tried piping on the eyes, mouth, nose, and buttons, the icing wouldn't really stick and kept coming up off of the cake when I lifted my piping bag, so I had to use a toothpick to separate the icing from the tip.

The nex task will be to try to expand my baking skills by baking another type of cake other than red velvet cake.

Total Estimated Time: 3 hours
Total Time Logged: 9.5 hours.

Enjoy the rest of the winter season and I hope you all are as happy as the snowman!


Monday, December 29, 2014

Holiday Cupcakes

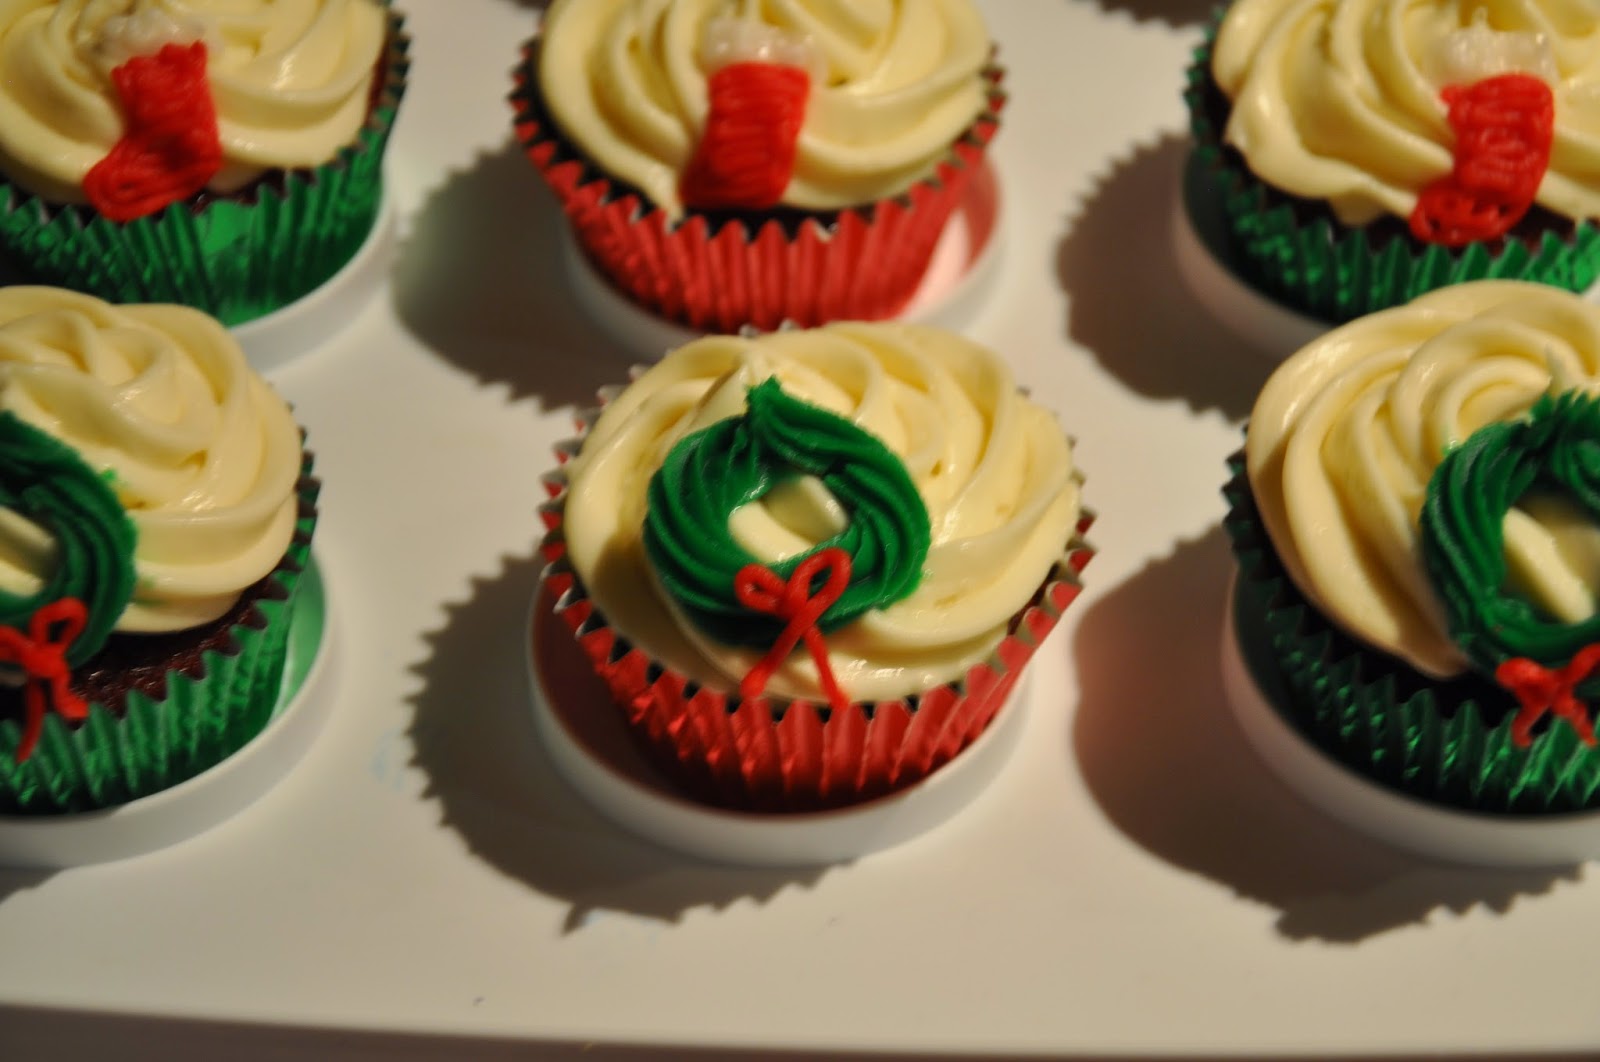
I baked red velvet cupcakes for Christmas using the same recipes as the ones used in the SF Giants cake, except I didn't use any food coloring in the cream cheese frosting.  Since I wanted to make the cupcakes Christmas-themed, I used only red and green colored cupcake baking cups.

Before putting the decorations on top of the cupcakes, I piped the cream cheese frosting, using the star-tip, onto the cupakes.  For the bunny cupcake, I melted some Hershey's chocolate and placed the melted chocolate into a silicone mold of the bunny head.  To melt the chocolate, I boiled water and then put a glass boil on top of the pot.  When melting the chocolate, I made sure that the glass bowl did not touch the boiling water.  In order to make the chocolate cool faster, I simply stuck the chocolate in the silicon molds in the refrigerator.  I found that working with milk chocolate is much easier than white chocolate. For the santa hat, stocking, and wreath cupcakes, I simply placed a tip on the tops of some red, white, and green store-bought tube decorating icing.
What I hope to accomplish next is to continue to increase my ability to decorate cupcakes, since they require many more, smaller decorations.

Total Estimated Time: 4.5 hours.
Total Time Logged: 6.5 hours.

Please comment below on anything that you think I did well on, or what I could do to make the decorations better! Thank you for the comments, and have a Happy New Year!


Tuesday, November 25, 2014

SF Giants

I baked a red velvet cake and decorated the cake with a San Francisco Giants theme as the first part of my Capstone Project.


I reduced the sugar of both the red velvet cake and the cream cheese frosting from 2 cups to 1 and 2/3 cups of sugar for each.  Even though I cut the sugar, the cake and the frosting were still sweet.  While I couldn't necessarily taste-test the cake batter to check the sweetness, I did taste-test the icing while making it to make sure it wasn't too sweet, washing my hands after every taste test.  The reason why I cut the sugar is because I don't particularly care for store-bought cakes simply because they are extremely sweet.


For the baseball, I printed out the SF Giants insignia onto a piece of paper.  I needed the design to be backwards, so I redrew the design onto another sheet of paper.  After doing so, I placed the design underneath a sheet of wax paper to pipe the design onto.  The reason I did the design backwards was so that when I flipped the design back over, the insignia would appear the right way instead of mirrored.  I used white chocolate and black gel, melting and dying the white chocolate onto a sheet of wax paper and then placing the design into the freezer for about 10-15 minutes after each additional layer was added (first the black gel, then the orange chocolate, and finally the white chocolate).
Estimated total time: 2 hours.
Total Time Logged: 2 hours.

*I found working with white chocolate very difficult: the chocolate would harden very quickly before I had the chance to really put the chocolate into a piping bag and pipe the design. Any suggestions or tips on how to work with white chocolate?
Therefore, a task I hope to accomplish is to discover other methods to decorate a cake, such as using Colored Chocolate Melts to make the decoration instead of white chocolate.
Feel free to comment on how I can do better on the designs, what I did well on, what I can improve on, and more!

My cake: